Where does the time go?
Oh, I know. To crying babies and messy toddlers and mounds of laundry and mouths that always seem to need to eat…! So, I skipped out on last month’s landscape Soap Challenge. The reality of sleep deprivation had set in hard core, and mama needed a break! But all the soaps were soooo awesome! I’m inspired to try a soapscape. Someday. It’s on my [neverending] list.
Now that sweet Violet is 2 months old, we’ve settled into a good routine. (She’s even already sleeping 8-10 hours a night!!! WAHOO!) And I simply could not miss this month’s Spinning Swirl Soap Challenge Club. These soaps look so cool, and I love learning new-to-me techniques. With this one, you make soap using at least a few colors, leave it in a nice fluid state, pour it in the mold, and then spin the mold. Sounds easy enough I suppose. I had no idea that you just spun the mold! No idea! How have I missed out on this technique? So clever and seemingly so simple.
The real challenge for me was the soap consistency. Let’s be completely honest here: soap consistency is always the biggest challenge, no matter what the design is. For me, at least. How about you, my fellow soapers? Getting the perfect trace for the perfect design, that’s the hardest part! Soap is so fickle. Temperatures, additives, fragrances, and oils all make such a huge difference in how quickly soap sets and changes.
I decided to use the slow-moving recipe that Amy has kindly shared for several of our challenges, one that I’ve used for several soaps now, like this one and this one. The recipe is 35% olive oil, 30% lard, 25% coconut oil, and 10% rice bran oil (or another light vegetable oil like avocado). It’s a lovely recipe, and I like to boost it’s bubbliness by adding 1 teaspoon of sugar per pound oils to my lye water, as well as 1 teaspoon of sodium lactate per pound oils to make a harder bar. To this batch, I also added some powdered goat’s milk, silk, and colloidal oatmeal. I also used a fragrance oil that I’m familiar with that doesn’t speed trace, one that just makes me laugh: Bite Me from Nature’s Garden. It’s fruity and fun, and it really does make you want to bite the soap! It kind of smells like citrusy chewy candy with a hint of strawberry and other yummy goodness. You know that smell that hits you when you walk into a candy store? Kind of like that. It’s playful and lends itself to using lots of bright colors.
Prep was really important for this technique as well. I had all of the colors, whisks and spatulas ready and waiting before I began making the soap. {For the other soapmakers out there: I used Bramble Berry’s 9-bar slab mold without its dividers since I wanted to cut the soap both vertically and horizontally. It took 46oz oils to make the soap 2 inches deep, and I actually cut it into 14 bars, 12 cut horizontally and 2 big end chunks.} I stole the lazy susan that I use for my spices from my cabinet, and I set my mold right on top of that.
With my workstation ready, I very carefully blended my lye and oils at low temperatures (around 80 degrees), and I slowly pulsed and stirred them to ensure a loose batter that was right at emulsification. I quickly divided the batter into 7 separate containers of about 3/4 cup soap each: blue mica, green mica, gold mica, coral mica, stained glass red pigment, lavender oxide, and titanium dioxide. Almost a rainbow!

Nice fluid soap ready to pour!
I quickly poured different colors in 6 different spots in my mold using a faux-funnel technique. To get very thin lines of color, I only dropped in a very small amount with each pour, which took quite a bit of time. By the last few pours, the soap was starting to set up. I whisked each color before pouring it to try to keep it fluid, and I was working furiously fast to try to get it all in and spin it!

Those last few pours were very messy!
I pounded the mold a few times to get out the air bubbles and settle the soap flat. Then I began spinning! So. much. fun! But to my great surprise, I realized that the spinning wasn’t really what made the soap move. It was the stopping. Duh. Abrupt stops. That’s the key! I spun several times and paused for a photo.

Half way through spinning!
Then I kept spinning and stopping some more. I was pleasantly surprised at how fluid the soap still was in the mold. When the lines were very thin, swirled, and starting to look kind of like a crazy-colored marble, I decided to stop. No sense in making a muddy mess of those pretty colors. But I tell ya, I could have kept spinning! It really was fun.

Spinning complete!

Especially around the edges, you can see the marbling effect. I was worried if I went any further, those fine lines would start to get muddy, so I made myself stop. Just pretend there are no air bubbles…
After impatiently waiting for a day (I looked at the clock constantly and forced myself to wait 24 hours), I unmolded. The glory of unmolding and cutting fresh soap!
This is the first vertical cut.

Look at the pretty swirls!!! I’m smiling (even though I messed up my cut a bit)!
And here are the horizontal cuts.

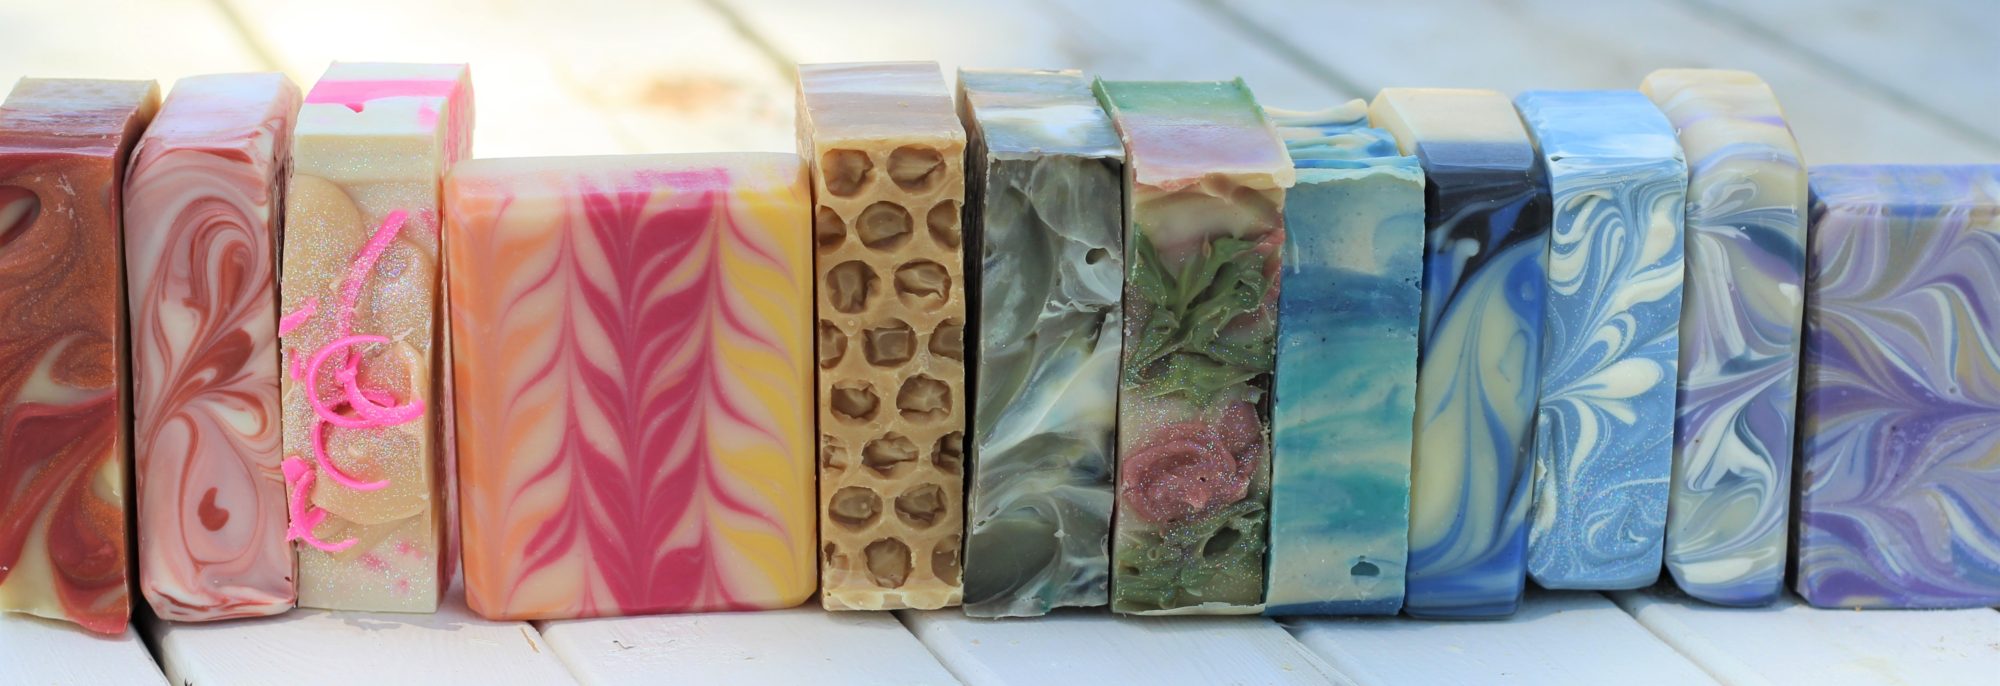
Bite Me soap made with the spinning swirl technique.

Does the spinning make you dizzy? 😀
I’m surprised that the soap didn’t swirl more in circles since I poured in 6 different places in the mold. I expected a few more swirls. But I love the thin lines throughout each bar. So much visual interest all around. And the smell. Yum!

So much visual interest all around every bar!
Once again, Soap Challenge Club success! Learned a new technique. Had fun. Met more awesome soapy friends. I’m a happy girl! Thanks, Amy! 😀
I love that you are back, Katy!! And sweet Violet is sleeping 8-10 hours? That’s amazing!! Your soap turned out fabulous, and you’re right – it’s the stopping that really swirls it. I hadn’t really thought of it that way before. You got nice, thin lines too! Great job!
Thanks, Amy! Happy to be back in the club this month! 🙂
And yes, 8-10 hours! It’s pretty awesome! Now, if only I could get the toddler to start sleeping that well…
Don’t know how you do it! So glad you’re back, and you’re spinning swirls look great. Congrats on baby Violet!
Thanks, Janie! Wasn’t this a fun challenge?!
Katy, you nailed it! Wasn’t this one a fun one to do? I was so glad I got round to giving it a go – I’ve missed the last few. Oh, and YY to unmolding and cutting fresh soap. It’s the little things…. LOL. Oh and ps well done little Violet on the 8-10 hours a night – my nearly 2 year old only just got there a very recently!! 😀
Thanks so much, Vicki! This was a certainly a fun one to join in for. Hehe! Unmolding is so fun.
As for the 2-year-old and sleep, mine has reverted back to waking a few times a night. Randomly. For no apparent reason. She used to sleep a solid 10 hours no problem! Ugh! Someday I suppose we’ll sleep again. Someday.
Wow. Psychedelic 😀 <3
Thanks! 🙂
Awesome swirls! Oh how I miss those days of little ones! You deserve a prize just for managing to make soap with all those little ones! Great use of a lazy susan too 🙂
Awe. Thanks, Amy! 🙂
Pingback: Tall and Skinny Shimmy Soap Challenge | Five Messy Babies